What is the home exterior painting process? 7 steps and aftercare

After a long day of cleaning up the garden bed bordering your home, you take a step back to look at all the hard work you’ve done.
As your eyes move from the vibrant sage and salvia flowers up to your siding, you notice a clear color difference.
When had the paint become so faint and chipped? How long has it been since you’ve painted the exterior of your home?
You decide to do your research and hire a professional to do the job. Luckily, you’ve chosen Southwest Exteriors! But how do you know that you will get a high-quality paint job?
We have been an established home remodeling company for over 30 years in San Antonio. We’ve mastered high-quality exterior painting over the years, whether you are getting your siding replaced and painted or just looking to spruce it up with a new paint job.
This article will outline the exterior painting process from start to finish, so you know exactly what to expect from your project.
We want you to feel confident in Southwest Exteriors’ ability to give you a high-quality result for your painting project, also known as a residential repaint. After reading, you will know all that goes into the painting process and why we do things the way we do.
Before the painting project begins
Following your initial consultation with a design consultant, you will schedule a color consultation and pre-coating conference.
Color consultation
You may schedule a free 90-minute color consultation with a color specialist, Angela Blessing.
She will help talk with you about the color scheme you are interested in and guide you to choosing the right colors.
As there are thousands of colors for you to choose from for your exterior, this helps take the pressure off of scouring to find the perfect colors on your own.
Pre-coating conference
During this appointment, a project manager will walk around the exterior of your house to inspect the project area while discussing the details of your project.
They’ll go over the scope of work for the project, the painting process, and the color scheme you’ve chosen.
You will also receive a pre-coating conference form with important information like contact information for your crew leader, how the crew will handle clean up each day, details regarding paint colors, and where the crew will store equipment.
Two main points regarding possible damages are listed below:
-
The coating crew will endeavor to perform work with minimal damage to landscaping; however, some damage may occur to bushes, shrubs, or trees that are close to the walls. Grass may have wear paths created from walking in the same area to work on walls. Southwest Exteriors cannot be responsible for unavoidable landscape damage.
-
The coating crew will take all precautions to protect the existing roof from damage when working from the roof to remove existing siding and install new siding (if applicable). Some damage may be unavoidable depending on the age and condition of the existing roof. If damage does occur, Southwest Exteriors will only be responsible for actual damages.
The project manager will also inform you of anything you must prepare before the first day of coating, like moving any outdoor furniture or decorative items away from and off of walls and trimming back any shrubbery close to walls.
An important part of this conference is to also schedule the start date of your project.
After your pre-coating conference, you are equipped with all the information you need for your project to begin. This time is also available for you to ask any questions and clarify any confusion.
Your project manager is there to help you through the whole project. No question is too small to ask, and they are only a phone call or text away for anything you need.
7 steps in the residential repainting process
Now comes the most exciting part of your project: the first day of coating. Here we will outline the seven steps to your residential repaint project so you know the exact schedule the crew will follow during the painting.
Typically, painting projects take 4-5 days to complete.
1. Crew arrival
First, the crew will arrive on the scheduled date at the scheduled time to your home. Second, the crew leader and project manager will be in contact with you the day before to check-in with the arrival time and answer any last-minute questions you may have.
Once the crew arrives, you will be introduced to them and talk through what will be done for that day.
The crew leader for your project is also an available resource for you to reach out to at all times with any questions or concerns regarding your project.
2. Repairing of any damage or problem areas
This step is applicable if you have any damage to your siding, like rotting or cracking. These repairs must be done before any other prep work so the painting can be done as cleanly and efficiently as possible.
Because we are exterior experts, we are able to repair or replace any siding or trim that is damaged. This way, you do not have to deal with a second contractor to first repair the siding before painting.
If the current paint is in poor condition, like cracking or peeling, it will have to be scraped off and sanded before priming.
Any repairs or replacements necessary will have already been discussed during your first consultation with a design consultant.
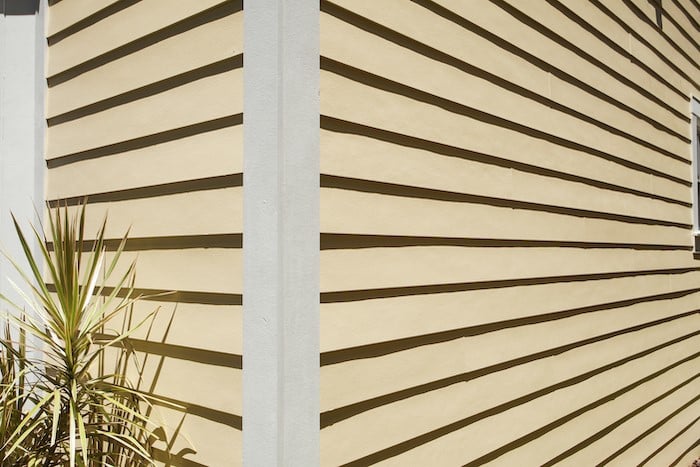
3. Power washing the exterior
All areas to be painted must first be power washed to clean the surface.
High-pressure power washing gets any buildup of dirt, pollen, and grime so that the surface will be clean and smooth before applying primer.
4. Caulking all seams
Before applying any primer, all seams and joints must be properly caulked and sealed. Any seam refers to where two boards, whether two siding boards or a siding to trim board, come together.
There is a very small gap where two boards butt together. If this seam is not caulked properly, it will allow water to infiltrate into the siding and frame of your home.
All nail holes visible on the siding and trim will also be filled and smoothed with spackle. This provides a seamless and smooth application of the paint and gives the best possible outcome.
We use caulk with a 45-55-year lifespan. Any caulk with a lifespan of less than this is not of quality and will not last.
5. Protective coverings placed
After the prep work for the project has been completed, coverings must be placed to protect any areas that you do not want to be painted.
Tarps will be placed along the home siding and covering shrubbery nearby. Any windows, door opening, and fixtures will be wrapped with protective coverings as well.
All of these areas must be covered because we use a sprayer to apply most of the paint. The paint would more than likely get in places you do not want it to be if coverings were not properly placed.
6. Applying the primer
Before the actual colored paint can be applied, a primer must first go down on all surfaces to be painted.
We use a Sherwin-Williams primer applied using a sprayer on the majority of the siding and brushes and rollers used on trim, soffit, fascia, and close edges.
A sprayer is used because it allows for the evenest amount of coverage. If the entire siding were painted using a roller, it might turn out uneven because when a roller is moving back and forth, it disperses paint on the way up and picks it back up on the way back.
If you have chosen a darker paint color, sometimes the primer will be tinted, which allows the top coat’s true color to shine with fewer coats.
The primer must dry completely overnight. Then the topcoat will be applied the following days.
7. Applying the topcoat
The topcoat is your colored paint. This is applied using the same practices as the primer using a sprayer, brushes, and rollers.
We use Sherwin-Williams Duration paint with a satin finish. This line of exterior paint is some of the best recommended and is incredibly long-lasting and durable.
The paint will be applied to the proper mil or thickness. Typically, only one coat of paint is needed to complete the project.
Once the topcoat is applied, all protective tarps and coverings will be taken down, equipment will be cleaned up, and your painting project is complete.
After the painting process
Now that your project is complete, a project manager will walk you through all the paint information and paperwork regarding your project, including the warranty.
Southwest Exteriors offers a lifetime warranty for your project for your life in your home. This covers cracking, peeling, or blistering in the paint, but not fading. In addition, the cost to repaint your exterior if any of these issues occur is covered under your warranty.
You will also be left with small cans of the paint that was used for you to perform any touch-ups.
If you have any questions or concerns following your repaint, you can always reach out to your project manager at any time. When you work with Southwest Exteriors, you are with us for life.
How to upkeep your new paint
Brand new, high-quality paint should last 12-15 years before you notice any fading or possible cracking and peeling.
The best thing you can do to protect your paint and keep it looking fresh is to power wash it once a year. This will clean off any dirt and grime that builds up throughout the year.
If excess dirt continues to buildup on the home's exterior, it will slowly become ingrained into the paint. This will depreciate the paint's durability and make it more difficult to clean off in the future if it goes untouched.
Taking continuous care of your siding and paint will save you time and money in the future. Just like tending to a garden, you have to nurture and protect your home throughout the year to sustain it.
Now you know what goes into a residential repaint
Knowing all the steps to your exterior paint job, the products we use, and application processes allow you to feel more confident and comfortable in your project.
A high-quality exterior paint job means there is great attention to detail. The little things go a long way, and taking the time to properly prep the siding, apply the topcoat, and everything in between makes a large difference.
With Southwest Exteriors, we never want you to feel like you are in the dark when it comes to your project. Communication is one of the most important principles to us, and we will continuously inform you of all updates regarding your project and timeline.
Want to learn more about a high-quality exterior paint job? Check out this article that details the exterior painting process and best and worst practices to look out for.