
Maybe you've noticed the outside of your home looking dull and dingy. Or maybe you're just tired of looking at the same outdated color your home has been for years.
No matter the reason for wanting to spruce up your exterior, you're ready for a change. You want to make your home pop and become the envy of the neighborhood, and changing up your home's exterior paint is the perfect way to do it.
But before starting any exterior project, you want to ensure you set yourself up for success. This starts with proper preparation before picking up a paintbrush.
Southwest Exteriors has been a trusted exterior remodeling company in San Antonio since 1989, specializing in siding replacements, window replacements, and exterior painting.
We understand the importance of prep work before beginning any project, and we want you to be educated on all you need to know on your remodeling project to make the best choices for you and your home.
This article will outline some of the best practices for preparing your home before painting the exterior, whether you plan to DIY the project yourself or hire a professional.
After reading, you'll be ready to get your exterior in shape for an epic makeover and ensure the outcome meets your needs for looks, durability, and longevity.
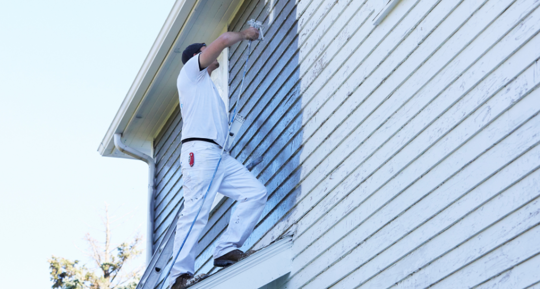
9 Tips For Preparing Your Siding For Exterior Paint
Preparing your home for any remodeling project is key to the project's overall success. Even with the highest quality products, the outcome will not match if the proper preparation is not made.
Whether you plan to paint your exterior yourself or hire a professional company for the project, here are _ tips to prepare your home's exterior correctly to provide the best possible surface for the paint to adhere to and look fabulous.
1. Cleaning Your Exterior Siding
Power washing the siding of your home is one of the easiest ways to prepare your exterior for painting. This process removes layers of dirt, dust, pollen, and mildew that can interfere with paint adhesion.
It's important to use a gentle setting on the power washer to avoid damaging the siding material. Also, consider using a cleaning solution specifically designed for exterior surfaces to enhance the cleaning process.
For any tough spots near the baseboards or around windows, use a solution of warm water and dish soap to scrub softly with a soft sponge or microfiber towel to remove all dirt.
2. Trimming Vegetation
Vegetation close to your house, like shrubs, trees, and overgrown bushes, should be trimmed back. This prevents plants from touching freshly painted surfaces and ensures they don't impede access to certain areas of your home.
It also reduces the accumulation of moisture on the house's surface, which can affect paint durability. Maintaining your vegetation after the painting is complete is also good practice for the upkeep of your fresh paint.
When working with a professional paint company, they most likely will advise you that they will trim back, move, or cover surrounding vegetation. However, they should always consult with you first to make sure no precious plants are removed or damaged without your permission.
3. Repairing Damages
Carefully inspect your home's exterior for any signs of damage. This includes cracks in the siding, wood rot, or holes that need attention on both your siding and around the windows and roofline.
Repairing these issues before painting helps create a smooth, uniform surface, which is crucial for optimal paint application and an aesthetically pleasing outcome.
Use appropriate materials for repairs, such as wood filler for wooden surfaces or stucco patch for stucco exteriors. Again, if you are working with a professional, you shouldn't have to worry about making your own repairs unless you want to save money on your project.
👉 Download this FREE guide to home remodeling! 👈
4. Scraping and Sanding
If your home has old, peeling, or flaking paint, it needs to be removed. Scrape off the loose paint and then sand the area to create a smooth surface.
(This step is only necessary when doing the painting yourself. A professional contractor should remove all existing paint as part of the process.)
Sanding is essential for ensuring that the new paint adheres properly and provides a flawless finish. After sanding, it’s a good practice to clean off the dust for better paint adherence.
5. Caulking and Sealing
Inspect all seams and joints, especially around windows and doors, and apply high-quality exterior caulk where needed.
Sealing these gaps prevents moisture from entering behind the new paint, which could cause peeling and other issues.
This step not only aids in paint adhesion but also improves the overall insulation of your home, so it's good to catch any gaps or failing caulk before it gets worse. Make sure the caulk is paintable to ensure a seamless appearance.
(Optional when working with a professional contractor.)
6. Protecting Windows, Lighting, and Outlets
Cover windows, doors, light fixtures, and other areas not being painted with painter’s tape and plastic sheeting. This protects them from paint splatters and drips, which can be difficult to clean and may cause damage.
You can also remove light fixtures and cover the opening with painter's tape and plastic to prevent any paint from getting behind your walls. Covering any exposed outlets and spigots is also crucial to ensure an even and aesthetically pleasing application.
Covering these areas also speeds up the painting process, as less caution is needed when working around them. Make sure the tape and coverings are securely in place to prevent any leaks.
(This step is not necessary when working with a professional contractor, as they should take these steps.)
7. Removing Loose Items and Wall Decor
Clear the area around your house of any movable items, like patio furniture, decorative items, potted plants, and grills.
Removing these items provides unobstructed access to the painters and protects your belongings from paint and debris. If there are fixed items like air conditioning units or permanent fixtures, cover them for protection.
Most professional contractors will ask you to remove any loose furniture, plants, and wall decor prior to their arrival to ensure no accidental damage is made to your personal items.
8. Address Mildew and Mold
If your exterior has signs of mold or mildew, treat these areas with a mold-killing solution before painting.
Painting over mold or mildew without treating it can cause the problem to resurface, potentially damaging the new paint. It's important to not only kill the mold but also to address the source of moisture that’s causing it.
Ensure the area is completely dry before proceeding with painting. Removing any mold and mildew is also important for the health of your home and your family. Excessive mold that goes untreated can cause respiratory issues over time, so ridding your home of this danger is crucial.
9. Check the Weather
Plan the painting project according to the weather forecast, especially when planning to paint your home yourself. Ideal painting conditions are dry weather with moderate temperatures. High humidity, rain, or extreme heat or cold can negatively affect the paint's application and drying process.
Paint applied under unsuitable weather conditions may not adhere properly and could have a shortened lifespan.
(When working with a professional, again, this is a preparation step you should not need to worry about.)
Preparing Your Home For A Successful Exterior Paint Job
Now that you know nine tips to properly prep your home before painting your exterior, you can set your project up for success and ensure your paint will last on your home.
With any home remodeling project, the preparation is one of the most key parts of the entire process. Even the highest quality products will not last if the project area isn't properly prepared for installation.
- When it comes to painting your home's exterior, some of the most important things you can do is clean the exterior, remove any wall decorations, plants, and furniture, and trim back shrubs and branches.
- If you plan to paint your siding yourself, some extra steps to take are addressing any damaged siding or trim, recaulking around areas that need it, covering all windows and doors, and eliminating any mold or mildew that may be present.
By properly educating yourself on the best methods of preparation, whether working with a contractor or doing it yourself, you will know what must be done to ensure your new paint will come out looking great.
Not sure if you should (or can) paint your exterior yourself or if you should hire a professional? Check out this article that compares a DIY and professional exterior paint job by weighing the pros and cons of each. Then, you have a better idea of which option is right for you and take the best next steps in transforming your home.